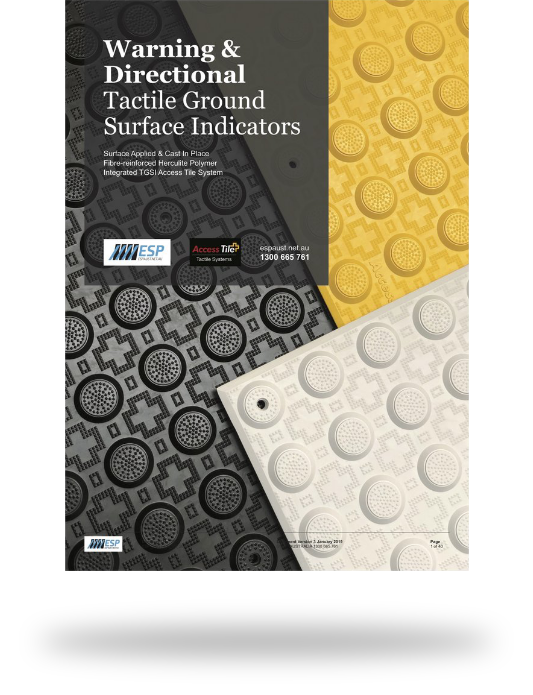
In recent times, Access Solutions National (ASN) Accredited Disability Access Consultant ‘Dale Sheppard’ has provided an independant product review of ESP’s Access® Tile. In this review, Dale shares his insight into Tactile Ground Surface Indicators, identifies common issues with TGSI installations and highlights the reason why ESP’s Access® Tile is his preferred choice of TGSI products in Australia.
Background
Dale has approximately 25 years professional and personal experience in the disability health profession.
It is with this academic background and living with a disability (Quadriplegia) that enables Dale to provide a holistic approach to compliance with current legislation as well as a focus on inclusion and accessibility for people with disability.
Dale has had an active role as an Accredited Member of the Association of Consultants in Access Australia (ACAA) since 2004 and has been practicing as an Accredited Access Consultant since that time.
Dale holds leadership positions on numerous State and Local Government Committees and is known for his strategic project management style and practical application of stipulated requirements. One such appointment was a Board Director of CBM Australia – A disability inclusive development charity responsible for delivering a portion of the Australian Government aid budget and working with developing countries to be inclusive and accessible the people with disability.
Since the formation of ASN Dale has been the principle Disability Access Consultant for a number of large corporate organisations, such as, Qantas Airways Limited, Fed Square and many of Victoria’s Local Governments.
Key Findings
Some key findings from Dale Sheppard’s Access® Tile product review are:
- The Access® Tile is the ONLY Tactile Ground Surface Indicator product that ASN will specify / recommend.
- It is the only TGSI product that doesn’t lift from the substrate causing trip hazards and maintenance issues.
- Contains premium UV stabilisers, which are not on top of the tile but incorporated into the fibre-reinforced polymer compound. This is imperative for Australia’s harsh climate and UV rays meaning that the Access® Tile will last much longer.
- Fully Compliant to AS/NZS1428.4.1:2009.
- The Access® Tile will not fade and blend into the substrate.
- Additional grip / features beyond what’s required for a traditional Tactile Ground Surface Indicator.
Watch Access® Tile Product Review Below:
Products Reviewed
The product reviewed in the video is ESP’s Surface Applied Access® Tile. This product can be mechanically and chemically secured to any stable surface. They are fast to install, simple to retrofit and withstand the toughest pedestrian use.
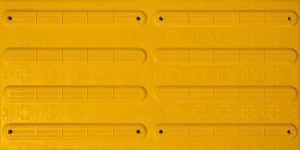
WARNING / HAZARD
300x600mm (White, Yellow & Black)


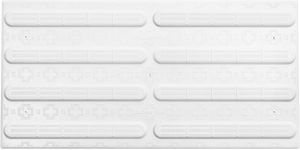
DIRECTIONAL
300x600mm (White, Yellow & Black)

For more information regarding Access Solutions National (ASN) Please visit https://asnpl.com.au/
 https://esp-australia-media.s3.ap-southeast-2.amazonaws.com/wp-content/uploads/2021/10/26041321/Copy-of-Thumbnail-Things-you-should-consider.jpg
Why are Tactile Ground Surface Indicators mandatory on footpaths and in buildings?
The practical need for accessible built environments is evident in the fact that 20% of Australians will experience a permanent or temporary disability over their lifetime.(1) That’s an astounding four million people who require universal access in Australia.
Australian Federal Legislation, The Disability Discrimination Act (DDA), passed into law in 1992 making it unlawful to discriminate against any person with a disability.(2) This law paved the way for many ingenious Australian innovations in this field, including Tactile Ground Surface Indicators (TGSI’s), and prepared the way for inclusion of Universal Access in many other codes and standards.
The use of TGSI’s, their design and their application, is founded on AS/NZS 1428.4.1. ESP Australia uses this Australian Industry Standard as the benchmark to its TGSI Access® Tile product design, procedures and policies.

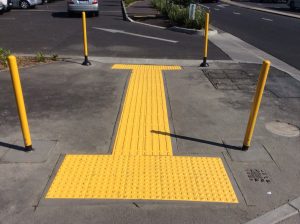
What do Tactile Ground Surface Indicators achieve for our footpaths and buildings?
TGSI’s assist persons with a temporary, permanent, full or partial vision-impairment to negotiate a built environment.(3)
They provide guidance and/or warning of an obstruction or hazard in any location where insufficient alternative or ‘natural’ tactile cue exists in a built environment. When combined with other environmental information, TGSI’s assist people who are blind or vision-impaired with their orientation.(4)
Why must we have Tactile Ground Surface Indicators in our buildings and on our streets?
The Australian Bureau of Statistics data revealed that in 2010, approximately 600,000 Australians were blind or living with some form of vision-impairment.(4) These persons who are classed as experiencing a vision impairment are mostly over 65 years of age.(5) According to Vision Australia, these figures are expected to climb to 1,200,000 by the year 2035.(6)

Who and what governs the use of Tactile Ground Surface Indicators within Australia?
Australian Federal Legislation, Australian & New Zealand Standards, Australian State & Territory Codes, and self-governing legal entity guidelines that may apply, affect and/or govern the design, use, application and placement of TGSIs are set out below:
1. Australian Federal Legislation – (requires mandatory compliance) – The Federal Disability Discrimination Act 1992 (DDA) – Provides protection for everyone in Australia against discrimination based on disability.
2. Access to Premises (Buildings) Standard (APS) – (Mandatory for New Building work or when a Permit is required for a building upgrade): A Guideline on the Application of the Premises Standards Version 2 February 2013.
3. The National Construction Code (NCC) – Building Code The Building Code of Australia (BCA) Section D Clause 3.8 – (Mandatory Compliance).
4. Australian State & Territory Codes, and Self Governing Regulatory Entity Guidelines.
5. AS/NZS 1428.2009 Design for Access and Mobility Part 4.1 – Means to Assist the Orientation of People with Vision Impairment – TGSI’s, including and not limited to:
• AS/NZS 1428.4.1. Amdt 1 – 2010-11-26
• AS/NZS 1428.4.1. Amdt 2 – 2014-12-10
• AS 1428.1 Part 1 – Design for Access and Mobility – General Requirements for Access New Building Work.
• AS 1428.2 Part 2:1992 – Design for Access and Mobility Enhanced and Additional Requirements – Buildings & Facilities
• AS 4586:2013 – Slip Resistance Classification of New Pedestrian Surface Materials Amdt 1:2017
• AS 4663:2013 – Slip Resistance Measurement of Existing Pedestrian Surface.
• SA HB 198:2014 – Guide to the Specification and Testing of Slip Resistance of Pedestrian Surfaces.
• AS 1657:2013 – Fixed Platforms, Walkways, Stairways and Ladders Design, Construction and Installation.
• AS 1735.5:2015 – Lifts, Escalators and Moving Walks Part 5: Escalators and Moving Walks.
• AS 1428.4.2:2018 – Design for Access and Mobility Means to Assist the Orientation of People with Vision Impairment – Wayfinding Signs
• AS 1742.7:2016 – Manual of Uniform Traffic Control Devices – Part 7 Railway Crossings.
• AS 1742.10.2009 – Manual of Uniform Traffic Control Devices – Part 10 Pedestrian Control & Protection.
• AS1742.10.2014 – Manual of Uniform Traffic Control Devices – Part 14 Traffic Signals
When and where are Tactile Ground Surface Indicators used in the built environment?
According to Australian & New Zealand Standard AS/NZS 1428.2009 Design for Access and Mobility Part 4.1 – Means to Assist the Orientation of People with Vision Impairment – TGSI’s, TGSI’s should be used at a ‘minimum’ in the following situations(7):
• Stairs and Stair landings
• Escalators & Travellators
• Pedestrian Ramps (not premises threshold ramps)
• Overhead Hazards (including potential obstructions wall protruding fixtures)
• Carriageways without kerbs – (i.e, that intersect at the same grade)
• Railway, Tramway and Light Rail Pedestrian –
(Waiting platforms and level crossings)
• Waterbodies -(wharves, lakes and ponds accessible by pedestrians)

(1) ABS LIVING WITH A DISABILITY ABS 29/04/2016 4430.0.10.001 – Disability, Ageing and Carers, Australia: First Results, 2015
(2) Disability Discrimination Act 1992, Act No. 135 of 1992 Administered by: Attorney-General’s Date of Assent 05 Nov 1992, https:// www.legislation.gov.au/Series/C2004A04426/ Compilations (3), (4), (5) & (6) Source: AS/NZS 1428.4.Part 1 (2009) AMDT No.1.1 Nov 2010
(7) Please Note: This is a summary of AS/NZS 1428.4.1. 2009 Clause 2. There are various other situations and applications that are exempt and or are called for under The Building Code of Australia, The Access to Premises Standards. Professional consultants should always be consulted with prior to the intended application of TGSI’s.
Confused about which Tactile Indicator fixings you should be using to install ESP’s Access® Tile Tactile Ground Surface Indicators? Not a problem, we’ve provided this article to simplify the process and hopefully answer some questions you may have.
Surface Applied Fixing Methods
ESP recommend using either of the following fixing methods when installing Surface Applied Access® Tile Tactile Ground Surface Indicators:
- Screw + Plug Method
- Tek Anchor Method (Sleeve + Nail)
Both methods are recognised & suitable under ESP’s comprehensive warranty and will boil down to the preference of the qualified and certified installer.
Screw & Plug Method
This method is most common amongst Civil Contractors and Councils.

Screws & Plugs used to install ESP’s Access Tile
Image (above) – Supplied Stainless Steel Screw + Plug (Screw Size = 1-1/2”)
How does it work?

Screws & Plugs – Step 1 & 2
Image (above right) – Using a vacuum, remove and clear away any dust.

Screws & Plugs – Step 3 & 4
Image (above left) – Insert supplied fixing plugs into the drilled holes, repeat this process for all 8 x holes. If using the 1200x600mm Hazard Tile you will need to repeat this process for all 20 x holes.
Image (above right) – Using a rubber mallet, tap the fixing plugs down flush to the concrete.

How to apply sikaflex-11FC & Screws & Plugs
Image (above right) – The image to the right demonstrates what the tile will look like after the screws , plugs and adhesive have been applied. You can see that after the screws have been fixed to the plugs, an anchor is created to develop a secure bond between the tile and the substrate.

Screws & Plugs – Step 5 & 6
Image (above right) – Torque down all screws in a cross pattern using a cordless drill until secure, making sure the tile is even and square.
Tools Required = Marker Pen, Template (optional), Hammer Drill, 6mm Masonry Drill Bit, Stainless Steel Screws + Plugs (Supplied), Rubber Mallet, 100mm Diamond Cup Grinder, Adhesive (Sikaflex-11FC), Cordless Drill.
For more information regarding the Surface Applied installation process, please visit our Installation Guide.
Tek Anchor Method
The Tek Anchor method is typically not as common among certified installers, however, it is still recognised as a suitable method to install ESP Surface Applied Access® Tile TGSI’s. Coloured sleeves and nails are supplied with ESP Surface Applied Access® Tiles when requested. The colour of Tactile Indicator chosen will determine the colour of sleeve that you will be supplied (Yellow, Black & White).

Tek Anchor colours available and sizing
Image (above) – The image above demonstrates the different colour sleeves available and the size of the sleeve + nail.
How does it work?
Tek Anchors – Step 1 & 2
Image (above left) – Using a template or as marked, drill fixing holes down 80mm with a hammer drill & 6mm masonry drill bit.
Image (above right) – Using a vacuum, remove and clear away any dust.

Tek Anchors – Step 3 & 4
Image (Above left) – Insert the supplied sleeve through the tile into the drilled hole, repeat this process for all 8 x holes. If using a 1200x600mm Hazard Tile you will need to repeat this process for all 20 x holes. Note* Dust will need to be vacuumed out of all the holes prior to putting the sleeves in.
Image (above right) – Using a ‘Nylon’ tip hammer, carefully tap the sleeve in to the hole until it appears flush with the tile.

Tek Anchors – Step 5 & 6
Image (Above left) – Insert the supplied stainless steel pin into the sleeve.
Image (above right) – knock it in using a ‘Nylon’ tip hammer and a nail punch if required. DO NOT use a steel head hammer as this could potentially crack the tile.
Tools Required = Marker Pen, Template (optional), Hammer Drill, 6.5mm Masonry Drill Bit, Tek Anchor Nails + Sleeves (Supplied), Soft Faced Hammer, 100mm Diamond Cup Grinder, Adhesive (Sikaflex-11FC).
For more information regarding Tactile Indicator fixings and the Surface Applied installation process, please visit our Installation Guide.
https://esp-australia-media.s3.ap-southeast-2.amazonaws.com/wp-content/uploads/2021/10/06221313/Thumbnail-Installing-On-Asphalt-2.pngA question that we are often asked by first time users and civil contractors is ‘Can I install Tactile Indicators on asphalt?’
The simple answer is no, Tactile Ground Surface Indicators of any type should not be fixed directly to asphalt. This is due to asphalt being an inherently unstable substrate, which is subject to movement caused by:
- environmental or climate influences
- uneven pavement surfaces
- traffic loading
- inadequate mixing
- laying pavement over previous cracks
- drainage deficiencies
- construction deficiencies
However, if treated properly, TGSI’s can be installed safely and correctly to AS/NZS1428.4.1:2009 and the chance of movement and lifting can be eliminated.

Correct / Preferred Method
ESP’s preferred method to properly install TGSI’s on to asphalt is to saw cut out the intended area that will require TGSI’s. Once the asphalt area has been removed, it should be neatly filled in with concrete. This will open up options to the installer, giving them the choice to either install ESP Cast In Place TGSI’s at the time the concrete is poured or retro fit ESP Surface Applied TGSI’s at a later date.
By adhering to this method and following the installation guides, ESP Australia will offer their full comprehensive warranty.
Image Below – The image below demonstrates the preferred method. The neat cuts indicate where the asphalt has been removed and has been replaced with new concrete. This eliminates the chance of ESP’s Access® Tile lifting and will ensure they perform to the highest standard for many years to come.
Installing TGSI’s On Asphalt using Butyl Tape (Application)
Where removing asphalt and replacing with concrete is not an option, an alternative method is to increase the adhesion of the Access® Tile with the use of Butyl tape. The tape replaces our regular method of adhesion (Sikaflex-11FC) and is installed to the underside of the tile around the perimeter. Along with the supplied fixings, this will create the strongest bond possible.
Whilst this method will usually improve the adhesion to asphalt, it will not overcome the longer term instability of the substrate, and therefore ESP Australia is unable to offer a warranty for TGSI’s installed directly on to asphalt.


Calculating Butyl Tape Requirements
Butyl Tape is available in 15m rolls.
In order to calculate how much butyl tape will be required for your project please use the formula below:
Number of Tactile Indicators (300x600mm) X 0.6
Example – 16 x Yellow Warning TGSI (300x600mm) x 0.6 = 9.6 metres
Butyl Tape required = 9.6 metres
If you have any questions regarding installing TGSI’s on asphalt or any upcoming projects that require Tactile Ground Surface Indicators on a different substrate contact us today!